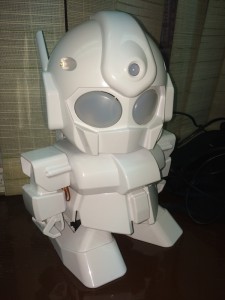
This is part one of Control Rapiro with Mobile Phone Tutorial. I will show you how to connect Rapiro to RedBearLab BLE Nano Board and use test code to test the connection. If you have successfully connected them, you can go to part two.
Author: sunny
Control Rapiro with Mobile phone Introduction

Rapiro is a cute, affordable, and easy to assemble humanoid robot kit. Rapiro comes with an Arduino compatible controller board, and you can reprogram Rapiro with Arduino IDE easily. One of the coolest feature is that you can extend Rapiro‘s functionality by connecting other components to enhance Rapiro’s capabilities.
“Its limitless possibilities all depend on you.”
This time, I will show you how to control Rapiro with IOS devices through BLE connection. I will divide this tutorial in two parts.
First will show you how to connect Rapiro to RedBearLab’s BLE Nano Board, and run a simple test code to confirm the connection.
Then in the second part of tutorial, I will show you how to connect and turn your IOS devices into a remote control and to control Rapiro‘s action.
Parts Need:
- Rapiro
- RedBearLab BLE Nano & MK20 USB Board (only need BLE Nano, but need USB Board to program the chip)
- Four Female/Male Jumper Wires
- IOS device
Software
- Arduino IDE 1.5.7 or later
- Xcode (for IOS Development, and you must be a registered IOS Developer in order to run the program on your IOS device)
- RedBearLab nRF51822-Arduino (Add support to your Arduino IDE for compiling nRF51822 firnware
Tutorial
Part 1: Connect RedBearLab BLE Nano to Rapiro
Part 2: Using IOS device to control your Rapiro through RedBearLab BLE Nano
Optional: Control Rapiro with Evothings Client
UnsafeMutablePointer to NSString
Converting UnsafeMutablePointer<UInt8> to NSString.
Today I was using a function that was bridging from a third party library in Objective-C.
The function has two parameters, first parameter has a type of UnsafeMutablePointer<UInt8>, second one the type is Int32, which is the length of the char array. My goal is convert it to NSString for logging information.
UnsafeMutablePointer<UInt8> is an array of char(or bytes) in the library API.
In order to do this, use NSString function:
convenience init?(bytes bytes: a href=”” UnsafePointer <Void >,
length length: Int,
encoding encoding: UInt )
Example:
IOS – Subclass from UILabel in Swift
This is an example from a book I read: iOS Core Animation: Advanced Techniques
The example in the book was written in Objective-C, which I would convert it into Swift Language as my learning reference. The goal of this example is to create a subclass of UIView, and overrides the layerClass class method to return different layer subclass at creation time. UIView calls the class method layerClass during its initiation, and uses the class it returns to create its backing layer.
In this example, a UILabel subclass called LayerLabel that draws its text using a CATextLayer instead of using the slower method drawRect approach that UILabel uses.
Some notes I marked down when converting from objective-c to swift:
1. NSObject class method is removed in Swift.
In objective-C example:
+(Class) layerClass {
return [CATextLayer class];
}
Instead, in Swift, we can simply return CATextLayer.self as class
override class func layerClass() -> AnyClass {return CATextLayer.self}
2. UIView initiation method now is called init() in Swift rather than initWithFrame: in Objective-C
In objective-C:
-(id) initWithFrame: (CGRect) frame {
if (self = [super initWithFrame: frame]) {
[self setup];
}
return self;
}
In Swift:
required init(coder aDecoder: NSCoder) {
super.init(coder:aDecoder)
self.setup()
}override init(frame:CGRect) {
super.init(frame:frame)self.setup()}
override func awakeFromNib() {
super.awakeFromNib()
self.setup()}
Here is the example rewritten in Swift:
Preventing Your IOS app from sleeping mode
Sometime, apps may need to prevent the sleeping mode to enhance user experience. For example, an app that play video would not go into sleep while the movie is playing. In IOS, a simple task can be done to prevent the app run into a sleep mode.
Just remember to turn on the sleeping mode whenever the task finish. (for example, when your app stop playing video, you should turn the sleeping mode on again.