10.1″LCD Display 1366×768 for my Raspberry Pi

IMG_5329

I bought a 10.1″LCD Display for my Raspberry Pi from SeeedStudio last month(a item got messed up so delayed for like 3 weeks), and finally arrived today.

http://www.seeedstudio.com/depot/101LCD-Display-1366×768-HDMIVGANTSCPAL-p-1586.html

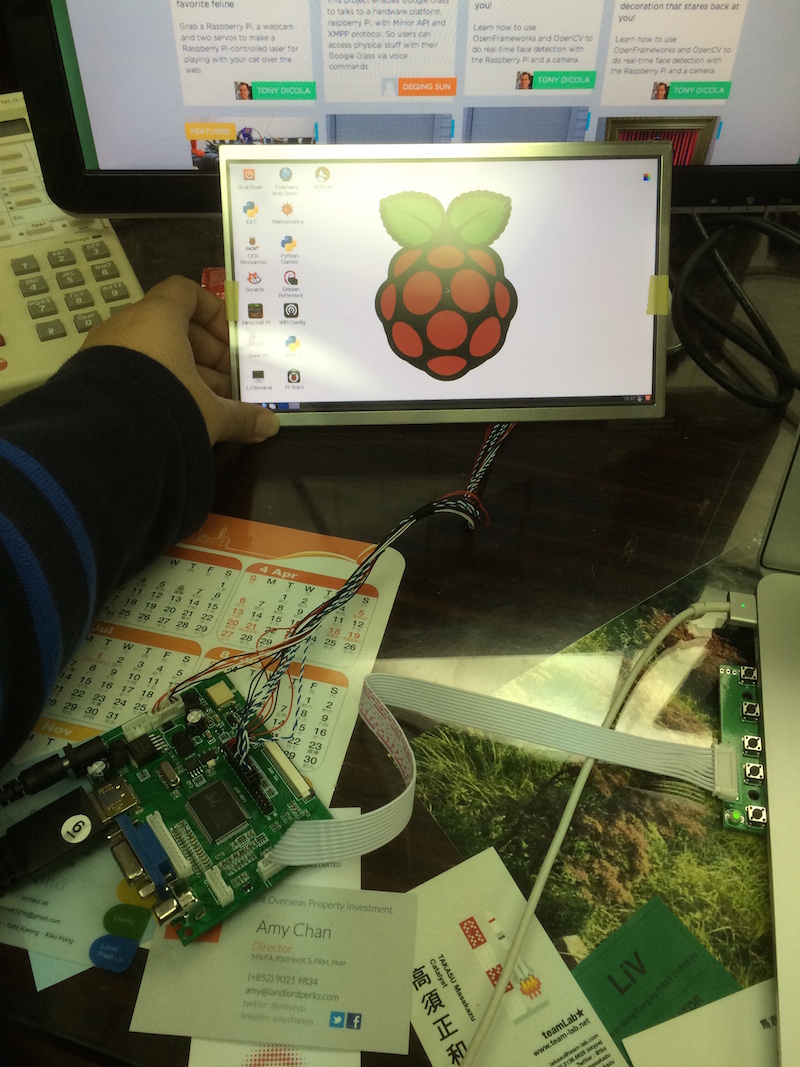
There are not much on instruction how to set it up, so I am taking pictures down as the instruction for references how to connect the display:

IMG_5330 IMG_5331

The control keyboard has 5 five buttons, they are Power, Down, Up, Select, and Back.  There is only one connector you can connect it, so there should be no mistake on connection the keyboard.

Also, change the config.txt file in the Raspberry Pi.

sudo nano /boot/config.txt

In editor, uncomment and change the following lines:

hdmi_force_hotplug=1

hdmi_drive=2

hdmi_group=2

hdmi_mode=81

config_hdmi_boost=4

This is a setting for 1366×768 resolution.  For more information the meaning for each setting, can find it at

http://elinux.org/RPiconfig

References:

1. http://www.seeedstudio.com/depot/101LCD-Display-1366×768-HDMIVGANTSCPAL-p-1586.html

2. https://learn.adafruit.com/hdmi-uberguide/2261-10-dot-1-1366×768-display-ips-plus-speakers

3. http://elinux.org/RPiconfig


Read More

WiFI adapter on Raspberry Pi

Recently I found that my raspberry Pi WiFi adapter with Realtek 8192cu chip will be turned into a suspend or sleep mode after awhile with no connectivity. That is very inconvenience because I have to restart or wire it with ethernet cable if the connection is dropped. After doing some research, I found a solution on Stackoverflow.

http://raspberrypi.stackexchange.com/questions/1384/how-do-i-disable-suspend-mode/4518#4518


It is because the adapter has power management features enabled by default.  To disable it so that the Wifi connection can keep alive, just add a configuration file for the adapter.

sudo nano /etc/modprobe.d/8192cu.conf

Add this line in the file:

options 8192cu rtw_power_mgnt=0 rtw_enusbss=0

Reboot the Raspberry Pi, and the WiFI connection will be stay alive!

Read More

Face Detection with OpenCV (Raspberry Pi and Picamera)

Thanks to OpenCV, now face detection is becoming a easy task and you can find this technology in many photography apps or social networks.

I am also new in the field, but I have created a sample program in python which will work with Raspberry Pi and Picamera.

This program will do a simple task: take a picture, and detect face in the picture.

I did not add any validation check as this is my first experiment on face detection.

Source code can be found in my git repository is https://github.com/sunnycyk/pi-facedetection

I will explain how my code work:

1.  Take a picture with picamera [doc] (line 16-17) and save the captured image to a filename call “myface.jpg

2. use OpenCV api function imread [doc]to read the file “myface.jpg” into a image object. (line 19)

3. line 21 will call function detect_faces

4. function detect_faces will first create a CascadeClassifier Object [doc] .  Classifier is a object detector which is trained with a few hundred sample views of particular object.  The word “cascade” in the classifier name means that the resultant classifier consists of several simpler classifiers (stages) that are applied subsequently to a region of interest until at some stage the candidate is rejected or all the stages are passed.  For more detail, please check the documentation in OpenCV, but basically we will provide a trained file that has data of a object that we want to detect.  

The train file for front face was actually located at OpenCV directory under /data/haarcascades/haarcascade_frontalface_alt.xml since I only wanted to a simple face detection.

5. Method detectMulitScale will return detected faces

6. Once we obtains all detected face, the program will draw a blue rectangle box around the face and write to a image named “detect.jpg” or if no face is detected, the program will just print out “No Face Detected” Message.

Here is the sample photo of me with detection:

detect

Next I will work with video mode.


Read More