OpenCV and Xcode

Here are the steps that to help you start running OpenCV program in Xcode. I will use a face detection tutorial program from OpenCV website (since I think it is the most interesting for me to learn OpenCV):

I assume you have installed OpenCV in your macbook. If not, can look at my old post.  I am using Xcode 5 and OpenCV 2.4.9.

http://sunnycyk.com/2014/06/install-opencv-opencl-support-macport-macbook-air/


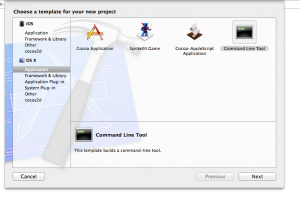
1. Start Xcode, and create new Project.  Choose OS X -> Application -> Command Line Tool

Screen Shot 2014-06-06 at 2.46.13 pm


2.  Choose product Name, and select Type C++ (since the example code is using C++).   In this example, I use “faceDetect” as product name.


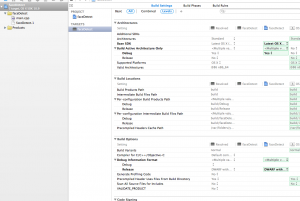
3. Select our target.

Screen Shot 2014-06-06 at 2.51.15 pm


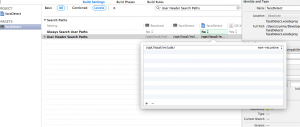
4. in Build settings tab,  Search “User Header Search Paths”

Screen Shot 2014-06-06 at 2.53.03 pm


5. It should be empty now.  Add “/opt/local/include/” to User Header Search Paths.  Our OpenCV header can be found there.

Screen Shot 2014-06-06 at 2.54.39 pm


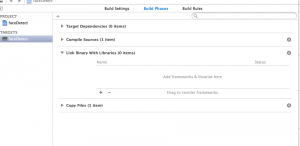
‘6. Next, go to Build Phases Tab, and we will add OpenCV library to the project.  Click the + sign under Link Binary With Libraries Session:

Screen Shot 2014-06-06 at 2.56.55 pm


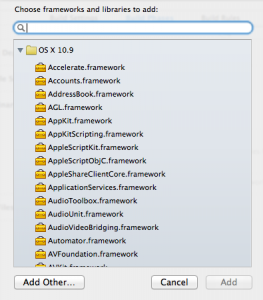
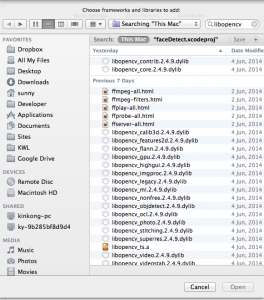
7. Choose Add Other, and search “libopencv”. You will see the library you need for your project.

Screen Shot 2014-06-06 at 2.59.12 pmScreen Shot 2014-06-06 at 2.59.50 pm


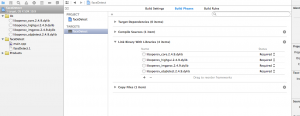
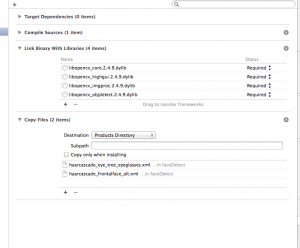
8.  For my sample face detection program, I will need 4 libs: libopencv_core.2.4.9.dylib, libopencv_highgui.2.4.9.dylib, libopencv_imgproc.2.4.9.dylib, libopencv_objdetect.2.4.9.dylib.  Select all of them and click open.  And I prefer to keep lib in the group, so I create a group lib for library files. You should see something similar like this:

Screen Shot 2014-06-06 at 3.05.22 pm


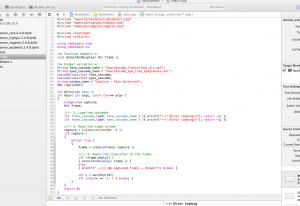
9. Preparation is almost done.  You can now replace the main.cpp file with the example code from OpenCV Tutorial

Screen Shot 2014-06-06 at 3.11.49 pm

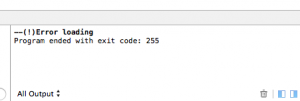
10.  click Product->Run and run the program, and your program should be able to compile, but you will see error at the output console.

Screen Shot 2014-06-06 at 3.13.19 pm

11. Don’t worry! Nothing wrong with the program, but our program actually requires two xml files for face detection.  There are

haarcascade_frontalface_alt.xml

haarcascade_eye_tree_eyeglasses.xml

We have not included them yet, so the program ran but exit with Error Loading Warning.  Next, we will add both files to the project.

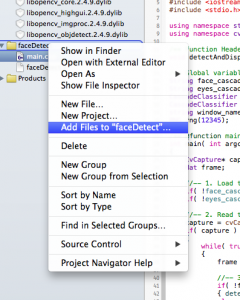
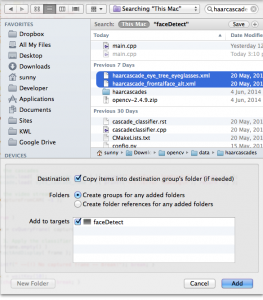
12. Add xml files to the project.  At Pop up menu, choose Add File To, and search for “haarcascade”, and should find the files we need.  We also want to copy files to the project instead of reference them.   Check the box “Copy items into destination group’s folder (if needed)” to copy both files to the project folder.

Screen Shot 2014-06-06 at 3.15.40 pmScreen Shot 2014-06-06 at 3.18.39 pm


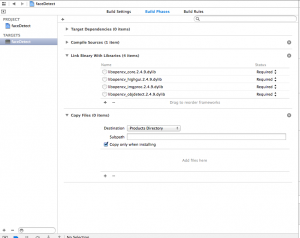
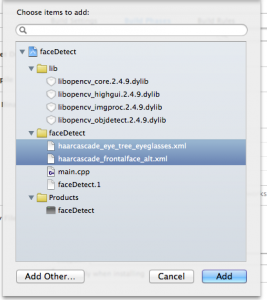
13. If you click run now, Error Loading will still shows in the output console.  It is because we still need to copy those files to the product directory unless you want to use absolute path for the file location.  Go to Build Phase and at Copy Files Session, add both files and copy to the Product Directory.

Screen Shot 2014-06-06 at 3.21.16 pm Screen Shot 2014-06-06 at 3.21.29 pmScreen Shot 2014-06-06 at 3.22.14 pm


14. Now you click run, your program should be running.

Screen Shot 2014-06-06 at 3.26.34 pm


15. You may find the sample program is running pretty slow since it did not set the resolution and using default. To make it smoother, you can reduce the resolution.  To change the resolution, after line 33, that line initial the camera
capture = cvCaptureFromCAM(-1);

Add following lines after that.

cvSetCaptureProperty( capture, CV_CAP_PROP_FRAME_WIDTH, 480 );
cvSetCaptureProperty( capture, CV_CAP_PROP_FRAME_HEIGHT, 360 );

This will adjust the resolution to 480×360. You can adjust the numbers until you find the best resolution and smoothness of video.

Ok that’s it! now you can start your OpenCV Programming with Xcode.
Read More

Install OpenCV + OpenCL support with Macport to Macbook Air

My Macbook Air comes with Intel HD Graphic 4000 card, so in order to take advantage of GPU, I will install OpenCV with OpenCL support. (no CUDA for my Macbook Air)

I would use Mac Port to install opencv.

If you have installed OpenCV with Mac Port before, then uninstall it in terminal by

sudo port uninstall opencv

To install OpenCV with OpenCL support, first edit the port file for opencv

sudo port edit --editor nano opencv

This will bring up an editor with opencv port file. Look for the line written:

-DWITH_OPENCL=OFF

and Change it to

-DWITH_OPENCL=ON

Then use Mac Port to install OpenCV + OpenCL:

sudo port install -d opencv +opencl

If there is no error, the installation should be done.

Read More

Face Detection with OpenCV (Raspberry Pi and Picamera)

Thanks to OpenCV, now face detection is becoming a easy task and you can find this technology in many photography apps or social networks.

I am also new in the field, but I have created a sample program in python which will work with Raspberry Pi and Picamera.

This program will do a simple task: take a picture, and detect face in the picture.

I did not add any validation check as this is my first experiment on face detection.

Source code can be found in my git repository is https://github.com/sunnycyk/pi-facedetection

I will explain how my code work:

1.  Take a picture with picamera [doc] (line 16-17) and save the captured image to a filename call “myface.jpg

2. use OpenCV api function imread [doc]to read the file “myface.jpg” into a image object. (line 19)

3. line 21 will call function detect_faces

4. function detect_faces will first create a CascadeClassifier Object [doc] .  Classifier is a object detector which is trained with a few hundred sample views of particular object.  The word “cascade” in the classifier name means that the resultant classifier consists of several simpler classifiers (stages) that are applied subsequently to a region of interest until at some stage the candidate is rejected or all the stages are passed.  For more detail, please check the documentation in OpenCV, but basically we will provide a trained file that has data of a object that we want to detect.  

The train file for front face was actually located at OpenCV directory under /data/haarcascades/haarcascade_frontalface_alt.xml since I only wanted to a simple face detection.

5. Method detectMulitScale will return detected faces

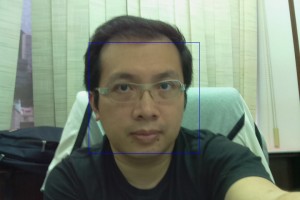
6. Once we obtains all detected face, the program will draw a blue rectangle box around the face and write to a image named “detect.jpg” or if no face is detected, the program will just print out “No Face Detected” Message.

Here is the sample photo of me with detection:

detect

Next I will work with video mode.


Read More