Ionic Framework Tab Solution

Today I was playing with Ionic Framework, and found there is small problem when using Tabs and reload the tab page that is not on the first page in the web browser.  The history stack is lost and so that the back button is disappeared.  (For example, I have a home tab, and home tab have multiple pages.  if a link on first page is clicked, then second page will appear, and back arrow button that link to the first page will appear on the header.  The history stack is keeping track by Angular. However, if refresh the browser on second page, the back arrow will not show up because all state will be gone as Angular restarted.)

Furthermore, even if I click on the Tab again, it will not bring me back to the first page and throw an error (Cannot call method querySelectorAll).

In order to avoid this happen, a small trick can be done by using Angular’s $location service in module.run() .  When the angular app is reload on your browser, $location service just make a redirection to your App’s first page.  and that’s it, so that your webapp will always start from the first page when reloaded!

For example,

angular.module(‘ionicApp’, [‘ionic’]).run(function($location) {$location.path(‘#/tab/firstpage’);});

P.S.  I think this only need to apply to Web app on web browser.  For PhoneGap App, I don’t think there is issue for this since your app will not reload from other page.
Read More

Using d3 with dependency injection in AngularJS

Today I will show that how to use d3 with Angular JS.

Usually, what you can do is add d3.js to your index.html file.  However, in order to keep global namespace clean in your angular module, it is better by using dependency injection like how Angular JS normally does.

To start, just create a d3 provider for the d3Service.

We use promise here to assure that d3 will be loaded in our browser.

To use d3 Service, just inject d3Service like other in AngularJs. For instance,


Read More

Creating a Simple Loading Angular Directive

I am working on an Angular Project that will call an API server.  It would be nice if adding a animation that indicating the page is waiting for server’s response.  There are many ways to do it such as using ng-show and ng-hide to show and hide the loading page.

Also, I found creating CSS loading is pretty simple, so I would like to use it on my page.  Loading page from http://cssload.net looks very nice, you may generate the style you like.  Only problem is CSS animation including a long line of HTML code like this:

and also it’s style file loading.css.

If I include every page for API request that it does not look that good.  Therefore, I created a Angular Directive for this.

Instead adding that long line of code on every page, now I only need to include something like this:

The Directive:

and the template file for the directive:

To use this, you will create a boolean variable “loaded” to the $scope. Your controller will be look like this GIST.  I am using ng-hide and ng-show to hide and show the loading page and the content.

If everything works, the tag spin-loading should be replaced by the template file (directives/spinLoader/spinLoader.html) and <div>{{ loadContented }} </div> should be included inside <div ng-show=”loaded” ng-transclude></div>.

This is GIST that I created for example.  (If there is any mistake, please correct me because I just did a quick clone from my code and modify for sample)
https://gist.github.com/sunnycyk/7276101

Ref:
http://docs.angularjs.org/guide/directive
Loading Spinners With AngularJS and Spin.js by Ankur Sethi’s Blog
CSSLoad.net

Update:
I created a sample in JSFiddlehttp://jsfiddle.net/sunnycyk/8ZhAp/ note: There are small different in my code in GIST because I just created a delay service for demo.  And I use $templateCache service for template.

Read More

Customizing the WordPress Login Logo

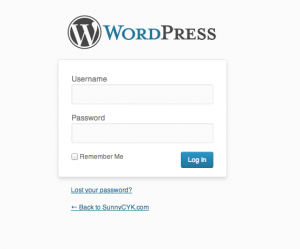
For WordPress Login, the default login page will be look like this:

defaultlogin

When designing a Theme, sometime you may want to customize the logo on the login page instead of default WordPress Image.  There are several ways to do this, mostly involving plugins.  We can also add couple lines to our theme to achieve that.

First, add this code to your functions.php file:

This will trigger when action hook “login_head” starts, and will add a style sheet YOUR_THEME_DIRECTORY/css/login.css to the login page.

Next, create a stylesheet called login.css under your theme directory.  In this case, it should be created under the sub folder called css.

The stylesheet should attach your logo image.  I use a image that I upload as example.  (wp-content/uploads/2013/10/cropped-sunnycyk.png)

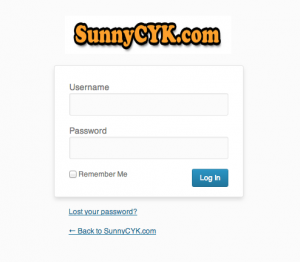
Now, just refresh your login page, you will see the logo changed!

Screen Shot 2013-10-25 at 11.15.59 pm


Read More

WordPress Trick for Local Configuration

When developing WordPress Site, sometime you may need to have more than one configuration such as different Database settings.  For example, I may have one database setting for my local machine and one for my webserver.  There are many ways to handle that, and my trick is this:

First create a file called local-config.php

Then in wp-config.php, modify little bit:

The magic here is you only keep local-config.php in your local machine.  When WordPress starts, it will try to locate local-config.php under the same directory of wp-config.php.  If it successfully located the file, it will use the configuration in local-config.php instead.  Otherwise, default config for your deployment server will be used if that file is not found.

You can apply the same logic for different environment settings.  :-)

Read More