NSPOSIXErrorDomain Error Code 57

I was writing an iOS app to connect to a socket server.  When I ran on the simulator, I kept getting error and disconnected immediately.  The Error Code was 57, and Error Domain is NSPOSIXErrorDomain.  I was scratching my head for awhile because I knew that I tested it and it was working when I first time running it.

After an hour of research, I found out the reason.  When changing the network, I have to restart the iOS simulator.  After I restarted the simulator, the socket connection was working again.  FML!  LOL!

Read More

IOS 8 Location-Based Notification

When first time using location based feature on your app, your app must send a request authorization message to user to authorise location usage.

In order to create the location-based notification in iOS8, app must define the string in Info.plist file under the NSLocationWhenInUseUsageDescription or NSLocationAlwaysUsageDescription.

nslocation

The message will be a description to user how the app will be using the location feature.  Remember that if you do not add this string, your app may not be able to use location based feature!

Read More

IOS 8 Local Notification with Actions

Quick note on how to set up local notification with actions in IOS 8:

1. Set up UIMutableUserNotificationAction.  You need to the following properties:

  • identifier (a string that will be used for respond to the action that user requested)
  • title (string to display on the button)
  • activationMode (enum for UIUserNotificationActivationMode: Foreground or Background.  define if the action running in background or bring the app to the foreground)
  • destructive (boolean, if set true the button will be red color)
  • authenticationRequired (boolean, set to true if you are doing some harmful action so that no other people can respond to the action)

2. Set up UIMutableUserNotificationCategory and set the identifier property.   We will group actions into different categories, and we will just use the category identifier to identify which set of actions will be used.

3. set category actions.  define default and minimal actions for different context.

4. Add category and type of notifications that will be used to UIUserNotificationSettings.

5. Register settings.  UIApplication.sharedApplication().registerUserNotifcationSettings(settings) and we are ready to send notification.

6. When creating a UILocalNotification, we will set the following properties:

  • category (category identifier we defined earlier.  actions belong to that category will be added to the notification)
  • alertBody (string, message to be displayed)
  • soundName (optional. sound for the notification)
  • fireDate (if you would like to schedule the notification to be display later, set this property)

7. Now you can call UIApplication.shareApplication().presentLocalNotificationNow(notification) or UIApplication.shareApplication().scheduleLocalNotification(notification)

Read More
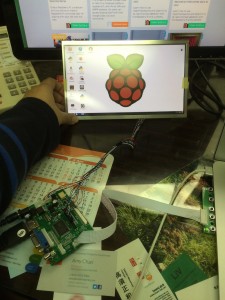
10.1″LCD Display 1366×768 for my Raspberry Pi

IMG_5329

I bought a 10.1″LCD Display for my Raspberry Pi from SeeedStudio last month(a item got messed up so delayed for like 3 weeks), and finally arrived today.

http://www.seeedstudio.com/depot/101LCD-Display-1366×768-HDMIVGANTSCPAL-p-1586.html

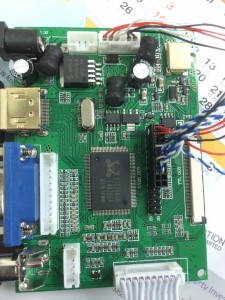
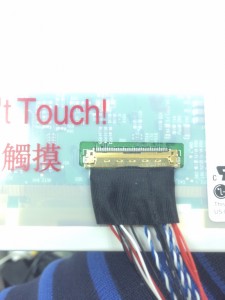
There are not much on instruction how to set it up, so I am taking pictures down as the instruction for references how to connect the display:

IMG_5330 IMG_5331

The control keyboard has 5 five buttons, they are Power, Down, Up, Select, and Back.  There is only one connector you can connect it, so there should be no mistake on connection the keyboard.

Also, change the config.txt file in the Raspberry Pi.

sudo nano /boot/config.txt

In editor, uncomment and change the following lines:

hdmi_force_hotplug=1

hdmi_drive=2

hdmi_group=2

hdmi_mode=81

config_hdmi_boost=4

This is a setting for 1366×768 resolution.  For more information the meaning for each setting, can find it at

http://elinux.org/RPiconfig

References:

1. http://www.seeedstudio.com/depot/101LCD-Display-1366×768-HDMIVGANTSCPAL-p-1586.html

2. https://learn.adafruit.com/hdmi-uberguide/2261-10-dot-1-1366×768-display-ips-plus-speakers

3. http://elinux.org/RPiconfig


Read More

WiFI adapter on Raspberry Pi

Recently I found that my raspberry Pi WiFi adapter with Realtek 8192cu chip will be turned into a suspend or sleep mode after awhile with no connectivity. That is very inconvenience because I have to restart or wire it with ethernet cable if the connection is dropped. After doing some research, I found a solution on Stackoverflow.

http://raspberrypi.stackexchange.com/questions/1384/how-do-i-disable-suspend-mode/4518#4518


It is because the adapter has power management features enabled by default.  To disable it so that the Wifi connection can keep alive, just add a configuration file for the adapter.

sudo nano /etc/modprobe.d/8192cu.conf

Add this line in the file:

options 8192cu rtw_power_mgnt=0 rtw_enusbss=0

Reboot the Raspberry Pi, and the WiFI connection will be stay alive!

Read More