It is not difficult to access the IOS address book in Swift, but I got a segmentation fault when getting contact list and put into an NSArray from an example I found on Stackoverflow.com
Therefore, I did that with Swift array.
It is not difficult to access the IOS address book in Swift, but I got a segmentation fault when getting contact list and put into an NSArray from an example I found on Stackoverflow.com
Therefore, I did that with Swift array.
Converting UnsafeMutablePointer<UInt8> to NSString.
Today I was using a function that was bridging from a third party library in Objective-C.
The function has two parameters, first parameter has a type of UnsafeMutablePointer<UInt8>, second one the type is Int32, which is the length of the char array. My goal is convert it to NSString for logging information.
UnsafeMutablePointer<UInt8> is an array of char(or bytes) in the library API.
In order to do this, use NSString function:
convenience init?(bytes bytes: a href=”” UnsafePointer <Void >,
length length: Int,
encoding encoding: UInt )
Example:
This is an example from a book I read: iOS Core Animation: Advanced Techniques
The example in the book was written in Objective-C, which I would convert it into Swift Language as my learning reference. The goal of this example is to create a subclass of UIView, and overrides the layerClass class method to return different layer subclass at creation time. UIView calls the class method layerClass during its initiation, and uses the class it returns to create its backing layer.
In this example, a UILabel subclass called LayerLabel that draws its text using a CATextLayer instead of using the slower method drawRect approach that UILabel uses.
Some notes I marked down when converting from objective-c to swift:
1. NSObject class method is removed in Swift.
In objective-C example:
+(Class) layerClass {
return [CATextLayer class];
}
Instead, in Swift, we can simply return CATextLayer.self as class
override class func layerClass() -> AnyClass {return CATextLayer.self}
2. UIView initiation method now is called init() in Swift rather than initWithFrame: in Objective-C
In objective-C:
-(id) initWithFrame: (CGRect) frame {
if (self = [super initWithFrame: frame]) {
[self setup];
}
return self;
}
In Swift:
required init(coder aDecoder: NSCoder) {
super.init(coder:aDecoder)
self.setup()
}override init(frame:CGRect) {
super.init(frame:frame)self.setup()}
override func awakeFromNib() {
super.awakeFromNib()
self.setup()}
Here is the example rewritten in Swift:
Sometime, apps may need to prevent the sleeping mode to enhance user experience. For example, an app that play video would not go into sleep while the movie is playing. In IOS, a simple task can be done to prevent the app run into a sleep mode.
Just remember to turn on the sleeping mode whenever the task finish. (for example, when your app stop playing video, you should turn the sleeping mode on again.
Here are the steps that to help you start running OpenCV program in Xcode. I will use a face detection tutorial program from OpenCV website (since I think it is the most interesting for me to learn OpenCV):
I assume you have installed OpenCV in your macbook. If not, can look at my old post. I am using Xcode 5 and OpenCV 2.4.9.
http://sunnycyk.com/2014/06/install-opencv-opencl-support-macport-macbook-air/
1. Start Xcode, and create new Project. Choose OS X -> Application -> Command Line Tool
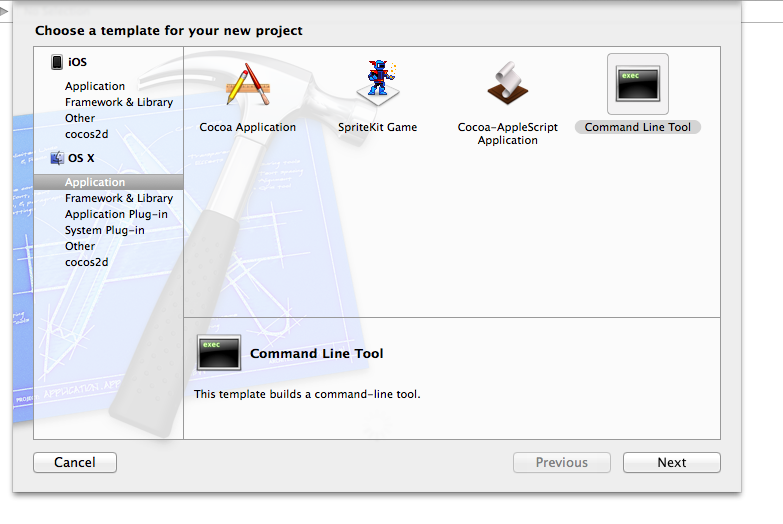
2. Choose product Name, and select Type C++ (since the example code is using C++). In this example, I use “faceDetect” as product name.
3. Select our target.

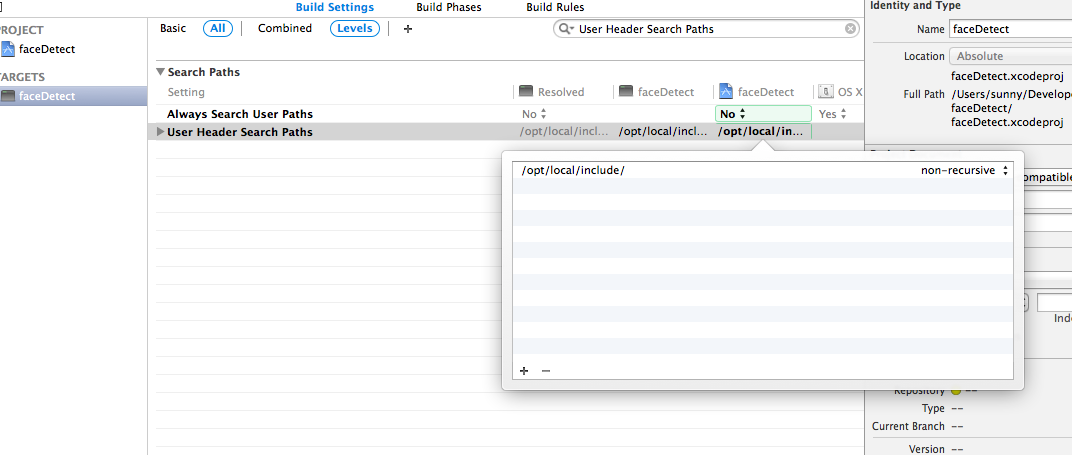
4. in Build settings tab, Search “User Header Search Paths”
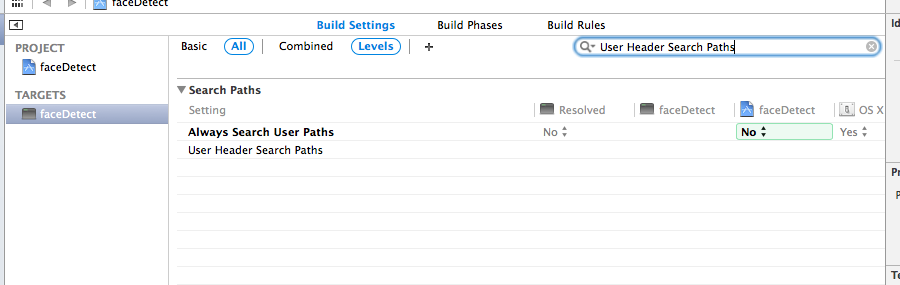
5. It should be empty now. Add “/opt/local/include/” to User Header Search Paths. Our OpenCV header can be found there.
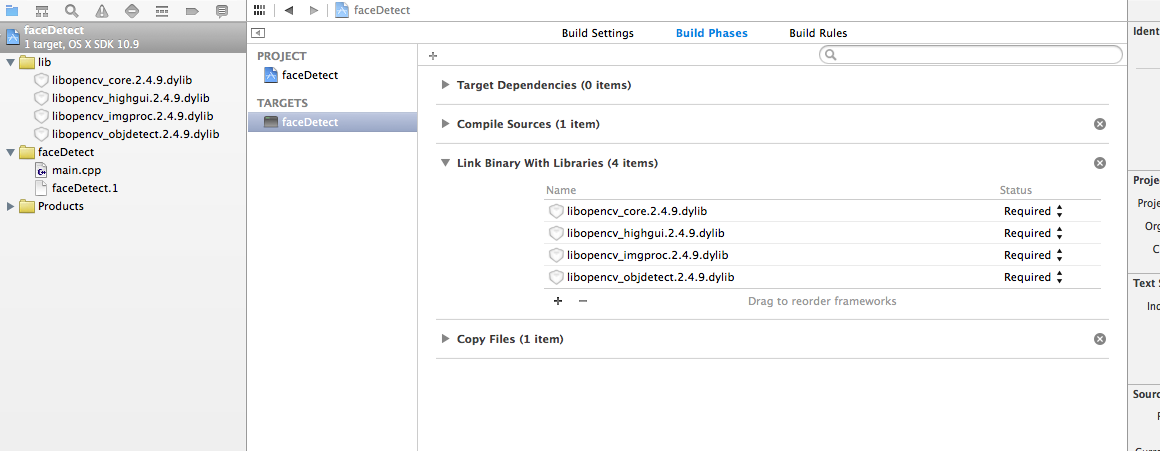
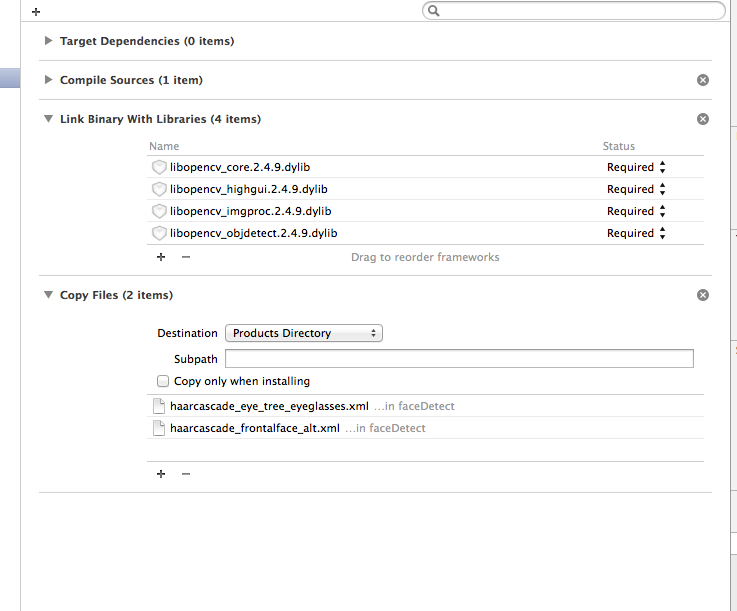
‘6. Next, go to Build Phases Tab, and we will add OpenCV library to the project. Click the + sign under Link Binary With Libraries Session:
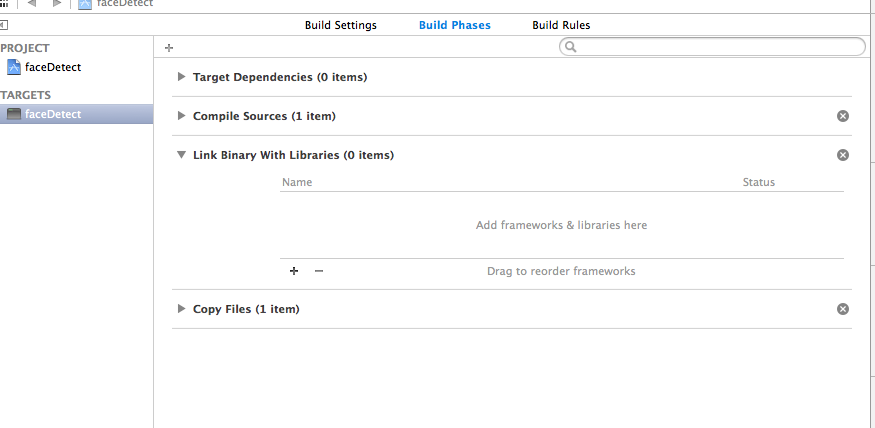
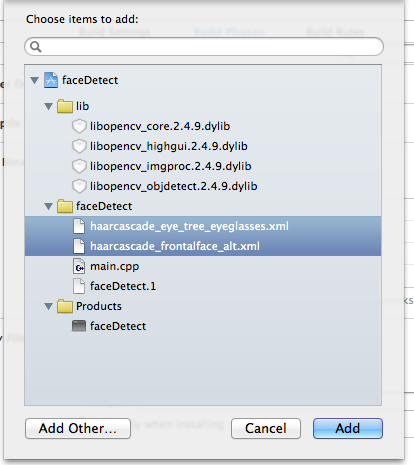
7. Choose Add Other, and search “libopencv”. You will see the library you need for your project.

8. For my sample face detection program, I will need 4 libs: libopencv_core.2.4.9.dylib, libopencv_highgui.2.4.9.dylib, libopencv_imgproc.2.4.9.dylib, libopencv_objdetect.2.4.9.dylib. Select all of them and click open. And I prefer to keep lib in the group, so I create a group lib for library files. You should see something similar like this:
9. Preparation is almost done. You can now replace the main.cpp file with the example code from OpenCV Tutorial
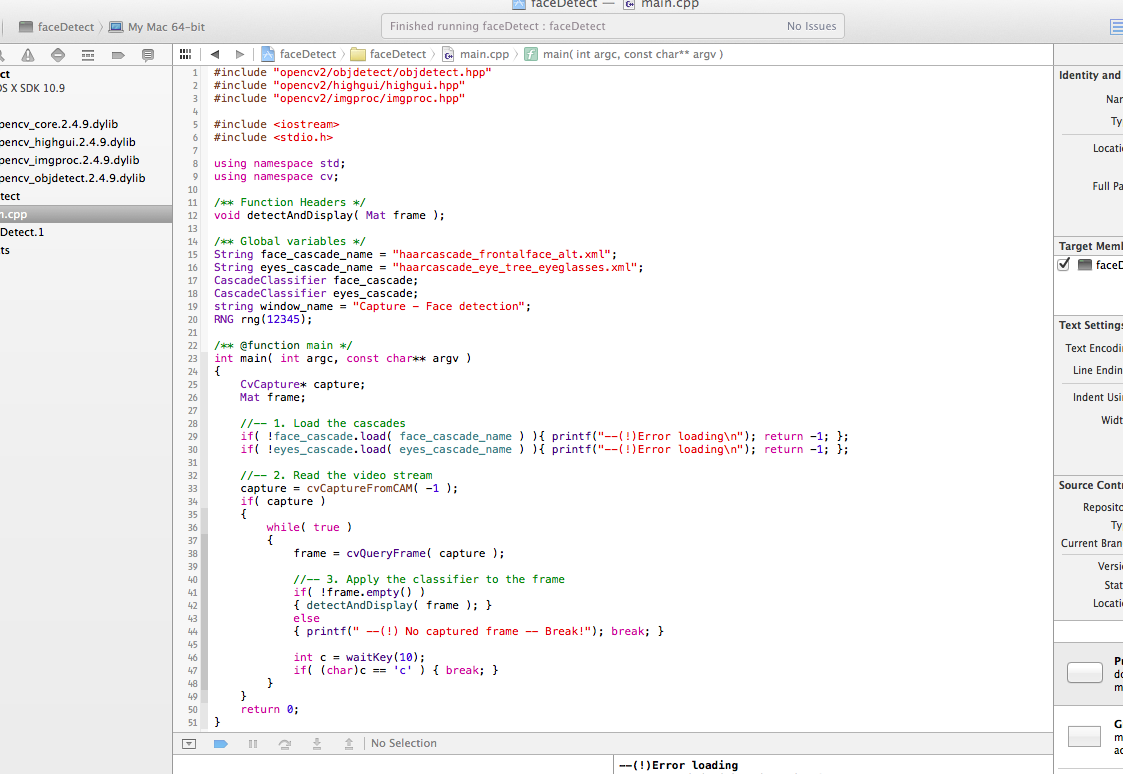
10. click Product->Run and run the program, and your program should be able to compile, but you will see error at the output console.
11. Don’t worry! Nothing wrong with the program, but our program actually requires two xml files for face detection. There are
haarcascade_frontalface_alt.xml
haarcascade_eye_tree_eyeglasses.xml
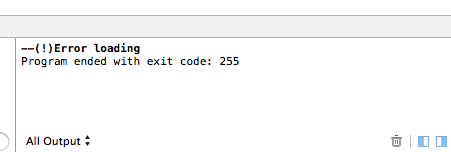
We have not included them yet, so the program ran but exit with Error Loading Warning. Next, we will add both files to the project.
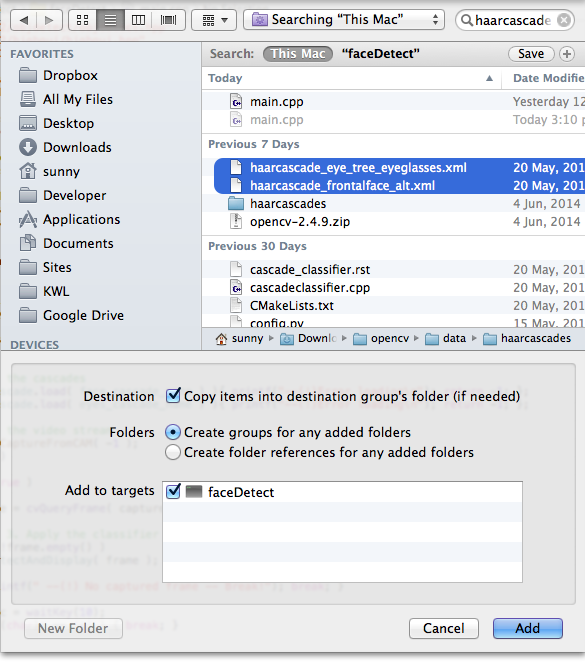
12. Add xml files to the project. At Pop up menu, choose Add File To, and search for “haarcascade”, and should find the files we need. We also want to copy files to the project instead of reference them. Check the box “Copy items into destination group’s folder (if needed)” to copy both files to the project folder.
13. If you click run now, Error Loading will still shows in the output console. It is because we still need to copy those files to the product directory unless you want to use absolute path for the file location. Go to Build Phase and at Copy Files Session, add both files and copy to the Product Directory.
14. Now you click run, your program should be running.

15. You may find the sample program is running pretty slow since it did not set the resolution and using default. To make it smoother, you can reduce the resolution. To change the resolution, after line 33, that line initial the camera
capture = cvCaptureFromCAM(-1);
Add following lines after that.
cvSetCaptureProperty( capture, CV_CAP_PROP_FRAME_WIDTH, 480 );

cvSetCaptureProperty( capture, CV_CAP_PROP_FRAME_HEIGHT, 360 );
This will adjust the resolution to 480×360. You can adjust the numbers until you find the best resolution and smoothness of video.
Ok that’s it! now you can start your OpenCV Programming with Xcode.